Creating a load balanced, highly available IIS web farm on Windows Azure
Introduction
In the previous post, we learned how to customize a virtual machine and capture it as a reusable image. In this post we are going to be building on top of that and see how we can quickly create a server farm of multiple servers that are load balanced.
Background
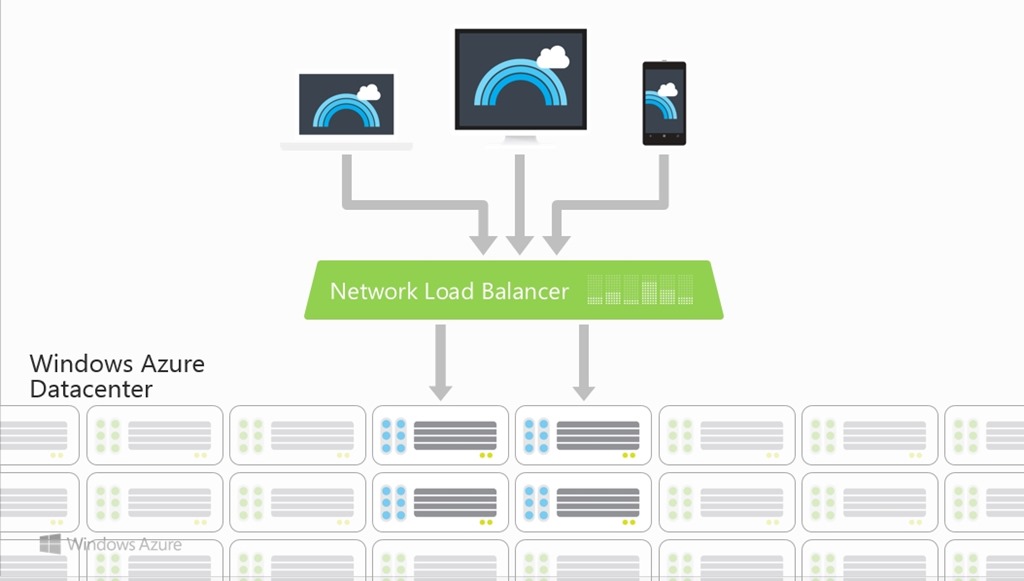
What is load balancing? When you scale your app to be served from multiple machines, you need something called a load balancer, which is a piece of hardware (or software) that receives incoming requests to your application, and selects which machine will serve such request.
 
Let’s start
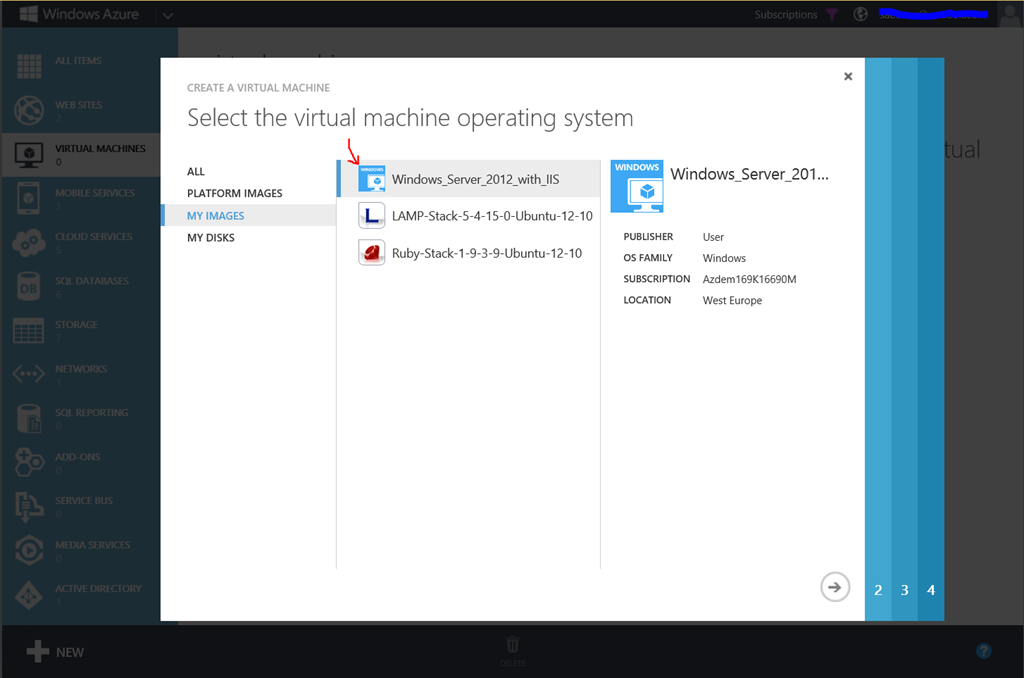
I’m assuming you followed the previous post and created a customized image. Open up the management portal and create a new virtual machine from the gallery.
When the gallery opens, select “My Images” then select the image we customized earlier.
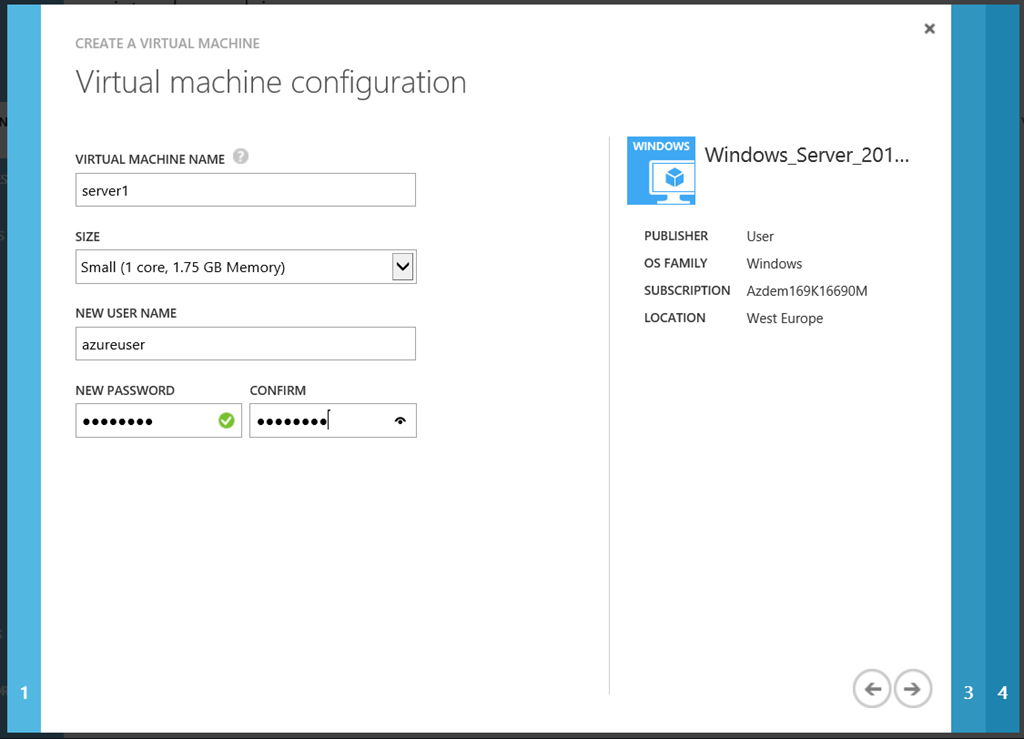
Enter the details of the first server in the farm and
Create it as a “Stand-alone Virtual Machine”
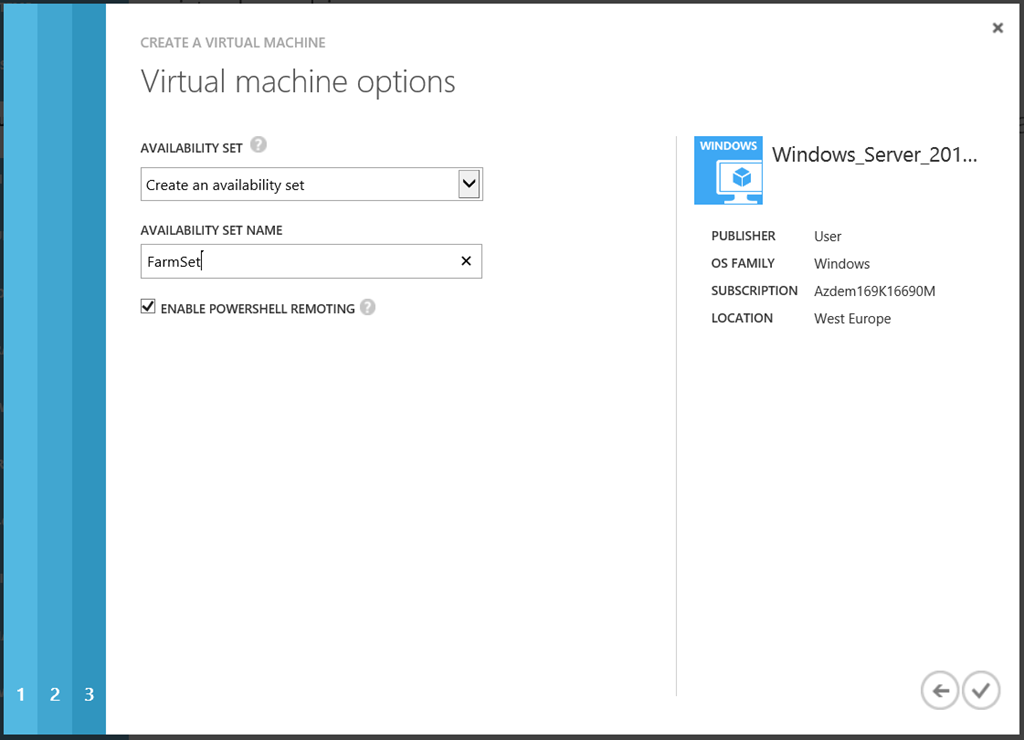
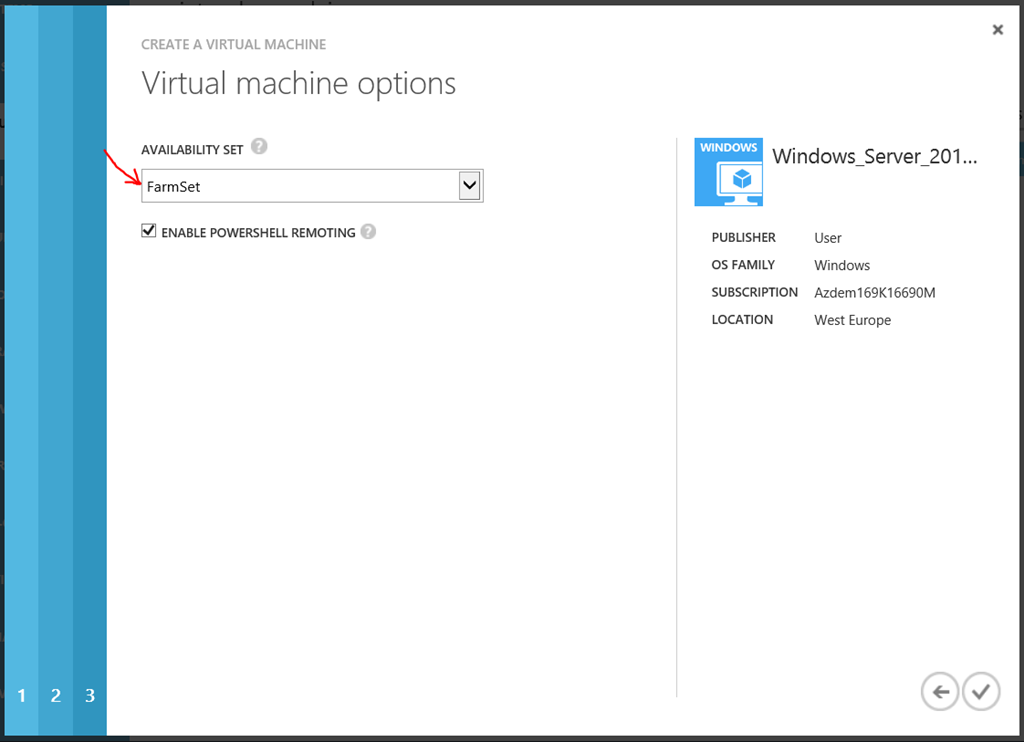
While you’re at it, create an Availability Set for the machine too. The availability set feature allows VMs deployed in the same set to be created on different server racks in the data center. Also being in an availability set means that whenever your VMs are taken down for maintenance or upgrades, they will never be taken down simultaneously, and your application will remain available.
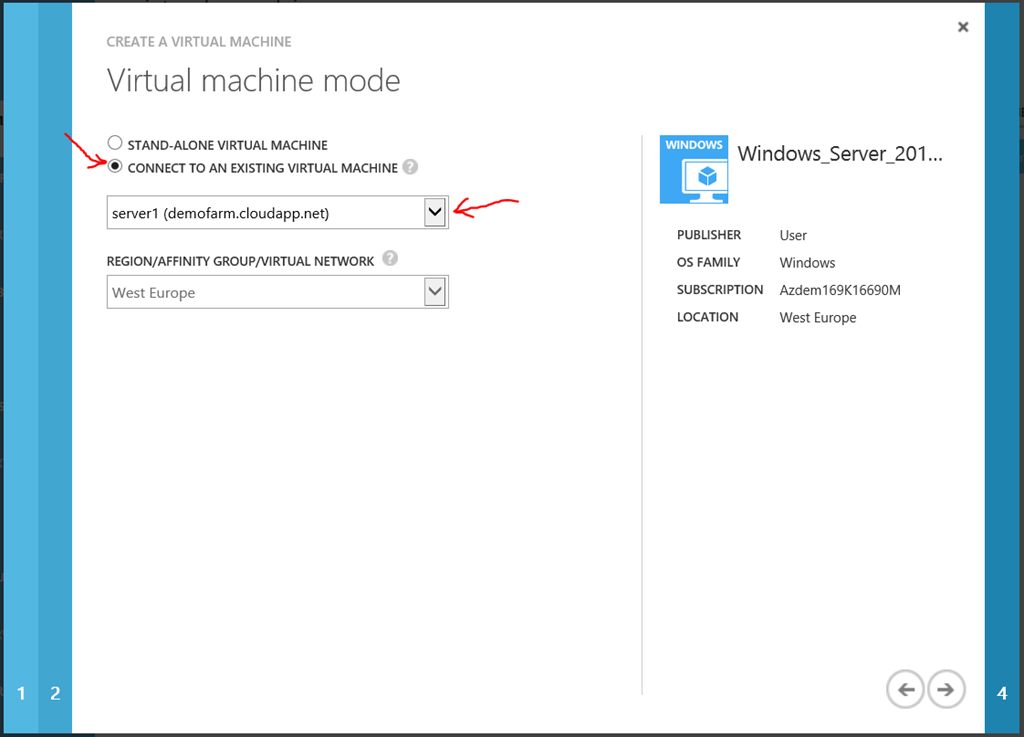
After the machine is provisioned, let’s create the second one, using the same procedure, but we’ll only change one step. Instead of creating it as a stand alone virtual machine, we will “Connect to an existing Virtual Machine” and pick the machine we created earlier. This will create the 2 virtual machines in the same network.
And choose the same Availability Set
Load balancing
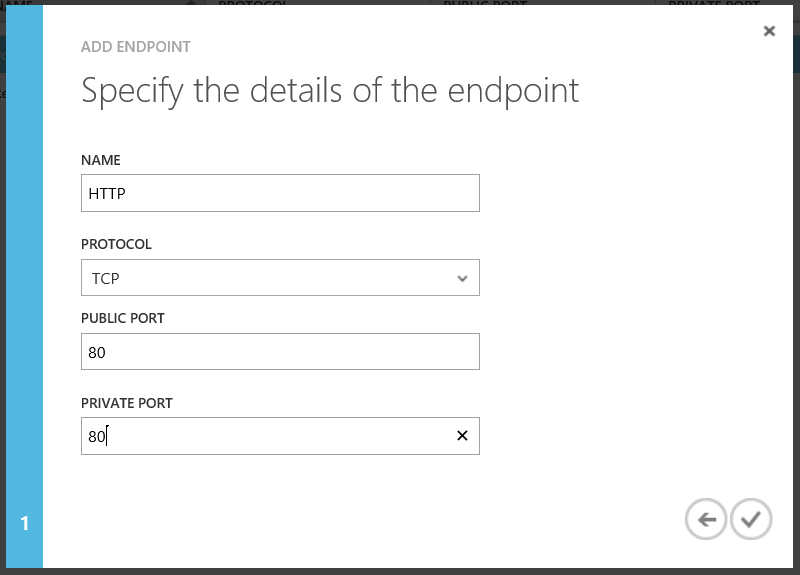
Remember in part one, we configured this virtual machine to be an IIS webserver. We will now need to open up the required ports (port 80) in order to make the machines accept HTTP traffic. In doing so, we will also configure load balancing in a moment.
Go to the “Endpoints” tab in the first machine, add a new endpoint listening on public and private ports 80 and save.
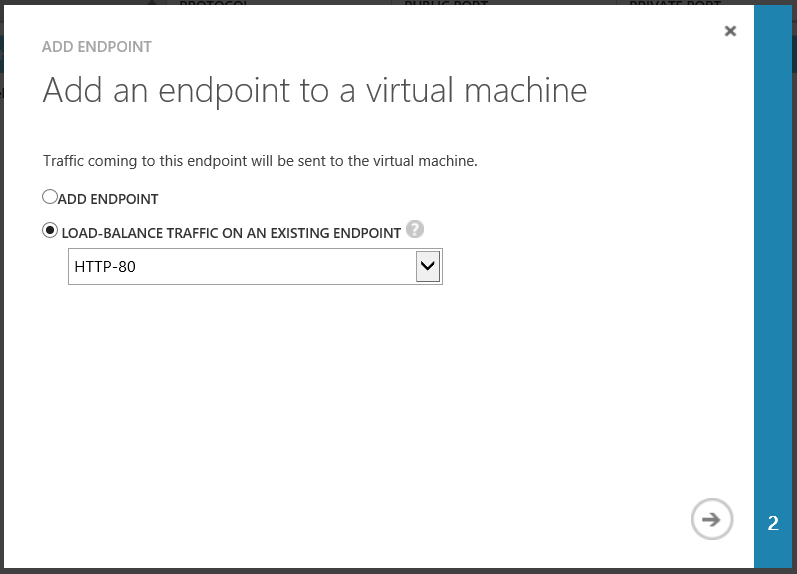
After your changes are applied, go to the “Endpoints” tab in the second machine and add a new endpoint, but this time, select the “Load-Balance Traffic on an Existing Endpoint” option, and select the endpoint we created earlier.
That’s it! You’ve created a load balanced web-farm of 2 machines. Now I want to be clear, if your web application doesn’t need to be running in a virtual machine, and can run in a Windows Azure Cloud Service or a Windows Azure Website, your scaling options become much simpler. You simply drag a slider and everything else just falls into place.
This can be the topic of another post though
Note: This post originally appeared on my MSDN blog at http://blogs.msdn.com/b/africaapps/archive/2013/05/30/creating-a-load-balanced-highly-available-iis-web-farm-on-windows-azure.aspx