Introduction
There is no doubt that Composer is a really cool dependency manager for PHP, sort of like NuGet for ASP.net, npm for Node.js and gems for Ruby. It makes the deployment process of libraries that much easier.
Composer is basically a PHP script that you provide with a json file with the your dependencies, and run with
php composer.phar install
In this post, I'll take you quickly on what you need to do in order to deploy your PHP website using Git, and setup the deployment process to execute the above command upon each commit. And we will do this on a Windows Azure Website.
Installing Composer locally
I'm going to assume you already have Git tools installed, so I'll use Git Bash in order to perform the next commands
cd ProjectsRoot
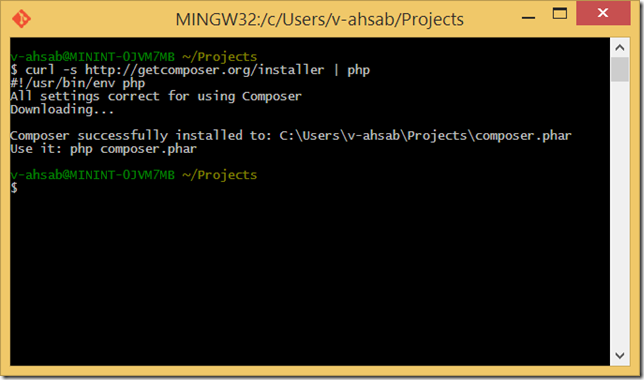
curl -s http://getcomposer.org/installer | php
Just doing the above will install composer into the "Projects" directory
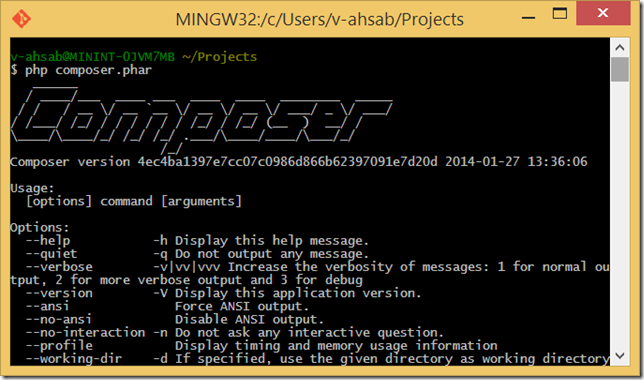
Confirm Composer in installed by running the below
php composer.phar
You should get an output like this
Using Composer for something useful. Installing Symfony2
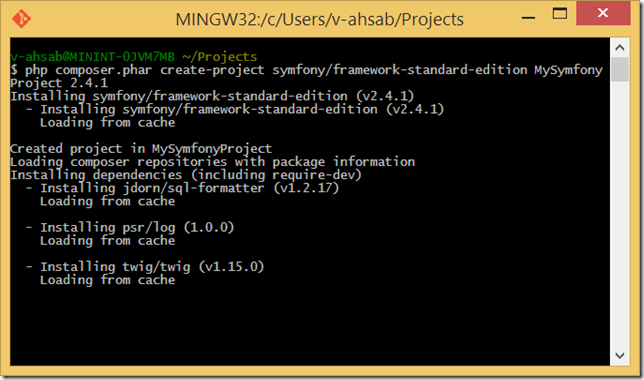
Now to demonstrate the power and versatility of Composer, let's install the Symfony2 PHP framework using Composer by executing this command in our Projects (usually this is our webserver's htdocs, wwwroot or similar) which will create a new Symfony project in the "MySymfonyProject" folder using Symfony version 2.4.1
php composer.phar create-project symfony/framework-standard-edition MySymfonyProject 2.4.1
Composer will crunch away for a while downloading Symfony and its dependencies
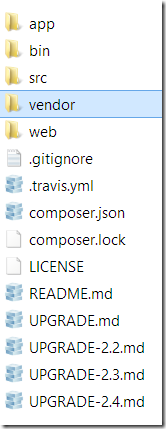
Once it is done you will be left with the below directory structure for your project
Let's take a look at the composer.json file
{
"name": "symfony/framework-standard-edition",
"license": "MIT",
"type": "project",
"description": "The \"Symfony Standard Edition\" distribution",
"autoload": {
"psr-0": { "": "src/" }
},
"require": {
"php": ">=5.3.3",
"symfony/symfony": "~2.4",
"doctrine/orm": "~2.2,>=2.2.3",
"doctrine/doctrine-bundle": "~1.2",
"twig/extensions": "~1.0",
"symfony/assetic-bundle": "~2.3",
"symfony/swiftmailer-bundle": "~2.3",
"symfony/monolog-bundle": "~2.4",
"sensio/distribution-bundle": "~2.3",
"sensio/framework-extra-bundle": "~3.0",
"sensio/generator-bundle": "~2.3",
"incenteev/composer-parameter-handler": "~2.0"
},
"scripts": {
"post-install-cmd": [
"Incenteev\\ParameterHandler\\ScriptHandler::buildParameters",
"Sensio\\Bundle\\DistributionBundle\\Composer\\ScriptHandler::buildBootstrap",
"Sensio\\Bundle\\DistributionBundle\\Composer\\ScriptHandler::clearCache",
"Sensio\\Bundle\\DistributionBundle\\Composer\\ScriptHandler::installAssets",
"Sensio\\Bundle\\DistributionBundle\\Composer\\ScriptHandler::installRequirementsFile"
],
"post-update-cmd": [
"Incenteev\\ParameterHandler\\ScriptHandler::buildParameters",
"Sensio\\Bundle\\DistributionBundle\\Composer\\ScriptHandler::buildBootstrap",
"Sensio\\Bundle\\DistributionBundle\\Composer\\ScriptHandler::clearCache",
"Sensio\\Bundle\\DistributionBundle\\Composer\\ScriptHandler::installAssets",
"Sensio\\Bundle\\DistributionBundle\\Composer\\ScriptHandler::installRequirementsFile"
]
},
"config": {
"bin-dir": "bin"
},
"extra": {
"symfony-app-dir": "app",
"symfony-web-dir": "web",
"incenteev-parameters": {
"file": "app/config/parameters.yml"
},
"branch-alias": {
"dev-master": "2.4-dev"
}
}
}
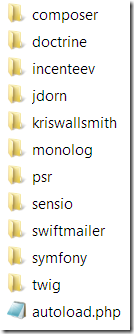
Note the "require" part, this is where Symfony specified which packages it needs and hence Composer downloaded them into the "vendor" directory:
Now copy the composer.phar file into your project directory for easier access. At any point if we want to add more packages and update old ones, you add them to the composer.json file and then run
php composer.phar install
To be continued..
In this part we covered how to create a Composer enabled PHP web application. In part 2 of this post, I'll cover how to create a Windows Azure Website, set-up Git deployment and modify the post deployment actions to run the composer install command after each commit. What benefit would that give us? You'd have to read part 2 in order to find out!
Note: This post originally appeared on my MSDN blog at http://blogs
Comments powered by Disqus

