Introduction
Have you heard of VM Depot? VM Depot is part of the Microsoft Open Technologies initiative, which is only one way of how Microsoft is opening up to open source technologies.
VM Depot is basically a repository of virtual machine images. Using VM Depot and Windows Azure, Developers can create and share images of Linux-based virtual machines, and share details on their experiences using those images.
We will be using the BitNami Ruby Stack which includes ready-to-run versions of Ruby, Rails, RubyGems, Apache, MySQL, SQLite, Subversion, Apache, PHP, phpMyAdmin, Git, nginx, sphinx, Imagemagick and more. It is completely integrated and configured, so you'll be ready to start developing your application as soon as the image is launched onto Windows Azure.
Getting the image onto Azure
There is an easy way to get VM Depot images onto your Windows Azure subscription. Let's start.
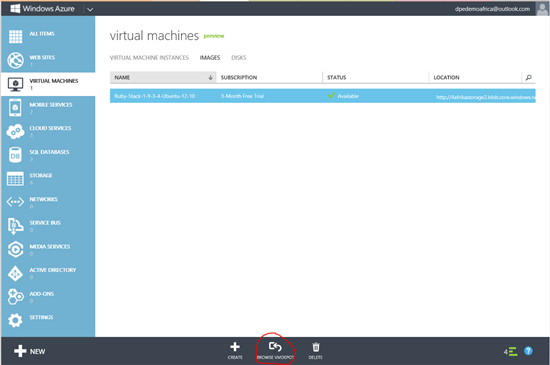
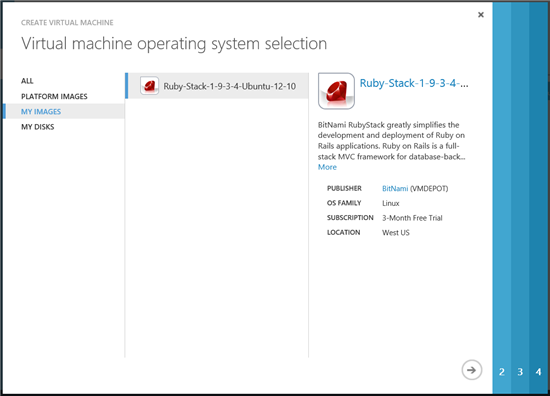
Go to the Management Portal the go to "Virtual Machines", and click on the "Images" tab, you will find a "Browse VMDEPOT" button. Click this.
You will be presented with a wide selection of Virtual Machines for different scenarios, whether it is a LAMP, Django, Node.js or Ruby on Rails stack.
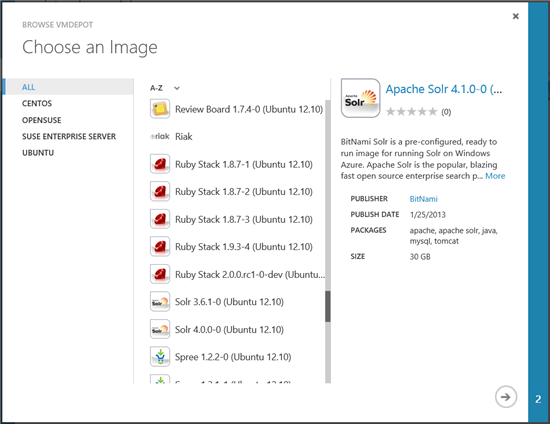
Select the image you desire, and select the storage account to download it on.
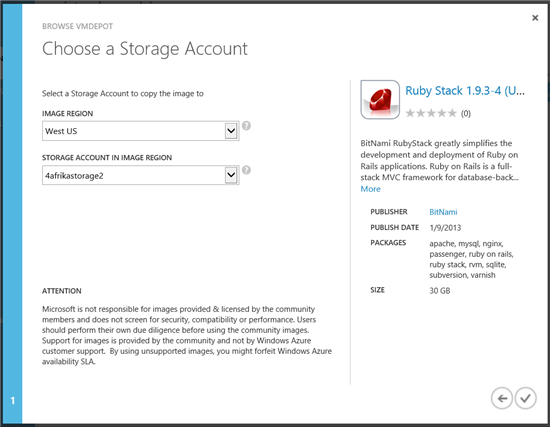
Now sit back and relax, go grab a coffee, stretch and come back. This will take a while, as Windows Azure is now downloading the Linux VM image from the servers (which is a 30GB image). When it is done, you will need to "Register" it so that it would be available for you when creating a new Virtual Machine.

Provision the Ruby on Rails VM on Azure
When you register the downloaded VM image, it is time to create a Virtual Machine using it.
Click on "New" to create a new Virtual Machine, and in the creation dialog, make sure you select "From Gallery".
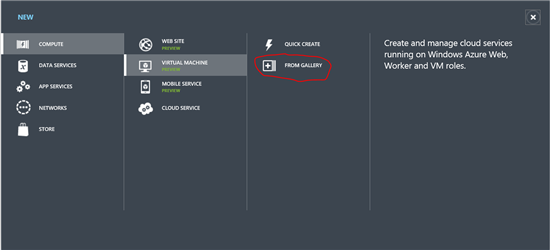
If the previous registration step was successful, you will be able to select the Ruby virtual machine from "My Images".
Go through the steps to set it up and then wait for it to be provisioned, then start it.
Login to the machine
Now you can use SSH through any SSH client (I use PuTTY) to connect to your brand new Virtual Machine.
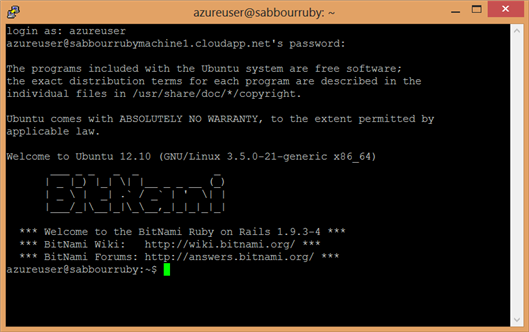
Since we are using the BitNami image, we can go ahead and follow the steps written here to verify the installation (though it is a bit outdated, so I'll outline what I've done below).
Go into the "stack" folder
azureuser@sabbourruby:~$ cd stackRun the rubyconsole
azureuser@sabbourruby:~/stack$ sudo ./rubyconsoleGo to the "projects" folder
root@sabbourruby:/opt/bitnami# cd projects/sampleStart the Rails server with the sample application
root@sabbourruby:/opt/bitnami/projects/sample# ruby script/rails serverYou will then see something like this indicating the server started your app
 => Booting WEBrick
 => Rails 3.2.11 application starting in development on http://0.0.0.0:3000
 => Call with -d to detach
 => Ctrl-C to shutdown server
 [2013-02-10 15:21:58] INFO WEBrick 1.3.1
 [2013-02-10 15:21:58] INFO ruby 1.9.3 (2012-11-10) [x86_64-linux]
 [2013-02-10 15:21:58] INFO WEBrick::HTTPServer#start: pid=2024 port=3000
Open the required port as an Endpoint
Before you can access this brand new sample Ruby website from the web, we need to punch a hole in the VM's firewall to allow the connections to go through. In this case, the webserver is running on port 3000, so we need to create an Endpoint mapping to that port from the Management Portal.
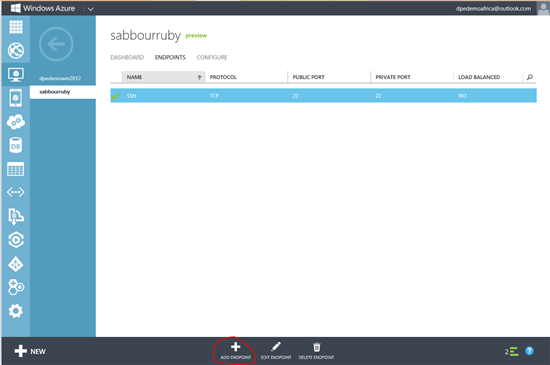
Go to your VM instance, and click on the "Endpoints" tab and click on "Add Endpoint"

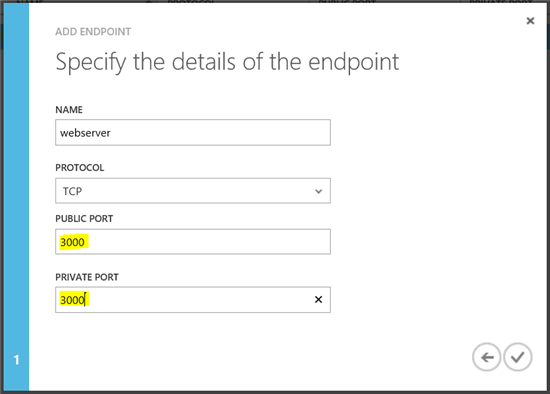
Then specify the public and private ports to be 3000. Apply and wait for the rule to take effect.
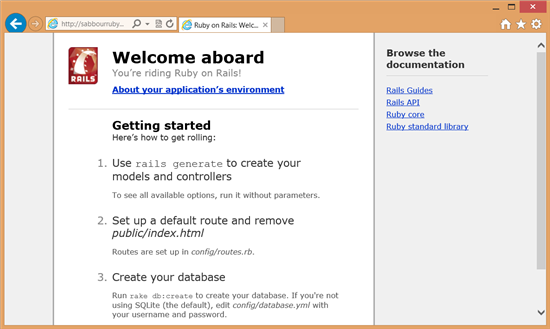
Now you are ready to get started!
Your first Azure backed Ruby on Rails website is now live on the web.
You can go ahead and use MySQL, download additional Ruby gems, and basically do whatever you want with this VM.
Note: This post originally appeared on my MSDN blog at http://blogs.msdn.com/b/africaapps/archive/2013/02/10/running-ruby-on-rails-on-windows-azure-using-a-vm-depot-image.aspx